Installing RolePay Into Your Store – A Guide
IMPORTANT!
Before you begin this guide, you will need two things: A standard bank account, and a business account. You can sign up for them at the Golden State Bank. Both are free. The standard account can be registered using the ATM terminal inside the bank, on the right side, and takes no time at all. A business account must be applied for with a form at the front counter, and you must select “cash register” and “store shelves/shopping basket” on the “What type of expansion would you like?” question. When you receive your business account pack from one of the administrators, THEN you can begin this guide!
VISIT THE GOLDEN STATE BANK IN PORTOFINO HERE.
WELCOME TO THE GUIDE!
It’s my hope that I can help other store owners to set up this awesome system, and make Portofino a little more diverse in it’s roleplay style! If you have any additional questions outside of this, please feel free to ask me (ArellaMarie Resident) in-world, or through a Discord message.
LET’S GET STARTED!
Let’s rez out the three main items you will need for this system.
RolePay Store Addon – Cash Register
RolePay Store Addon – Shopping Basket Giver
RolePay Store Addon – Shelf (Multiple)
(“Single” shelf only allows you to sell one product at a time per rezzed shelf. “Multiple” allows for up to 10.)
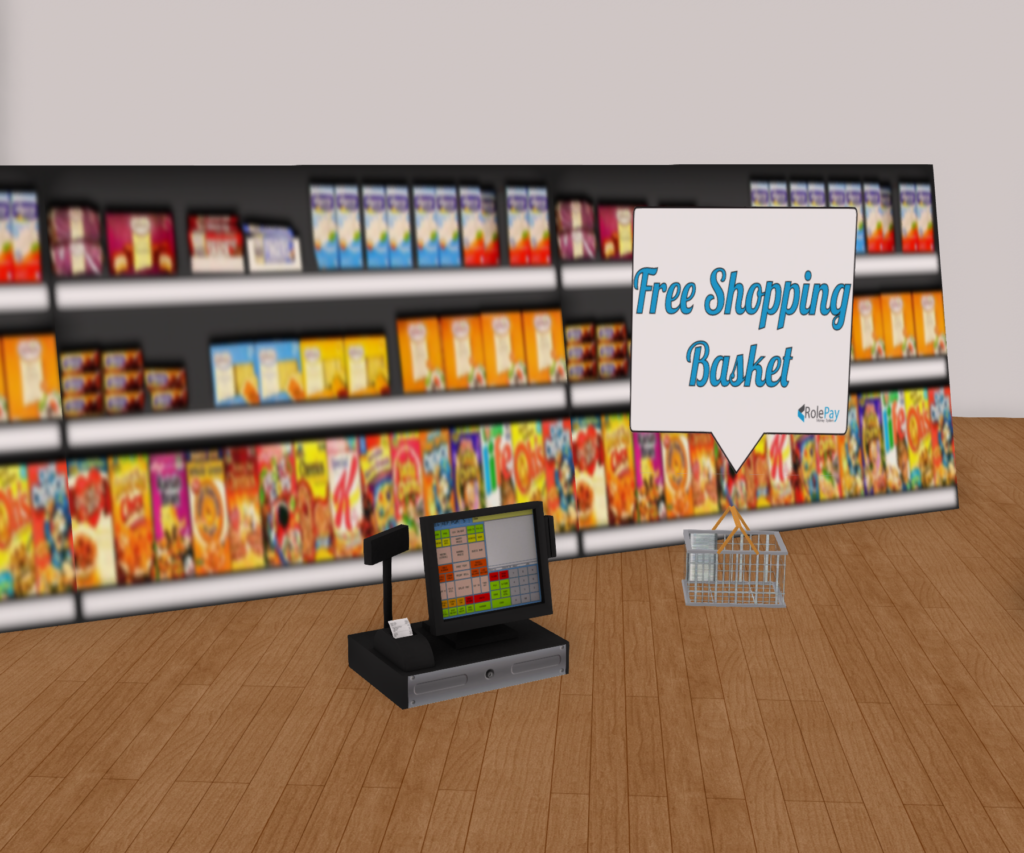
Perfect!
SETTING UP THE CASH REGISTER:
When you received your pack for your business account, you were given a special API number for your cash register. Click the cash register, and input your API key into the box that appears.
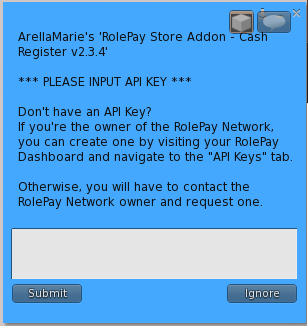
You can click the cash register to set up other details, but if you simply want it to just work, and to deposit payments onto your personal card, then you’re done and can put it in place!
THE SHOPPING BASKET:
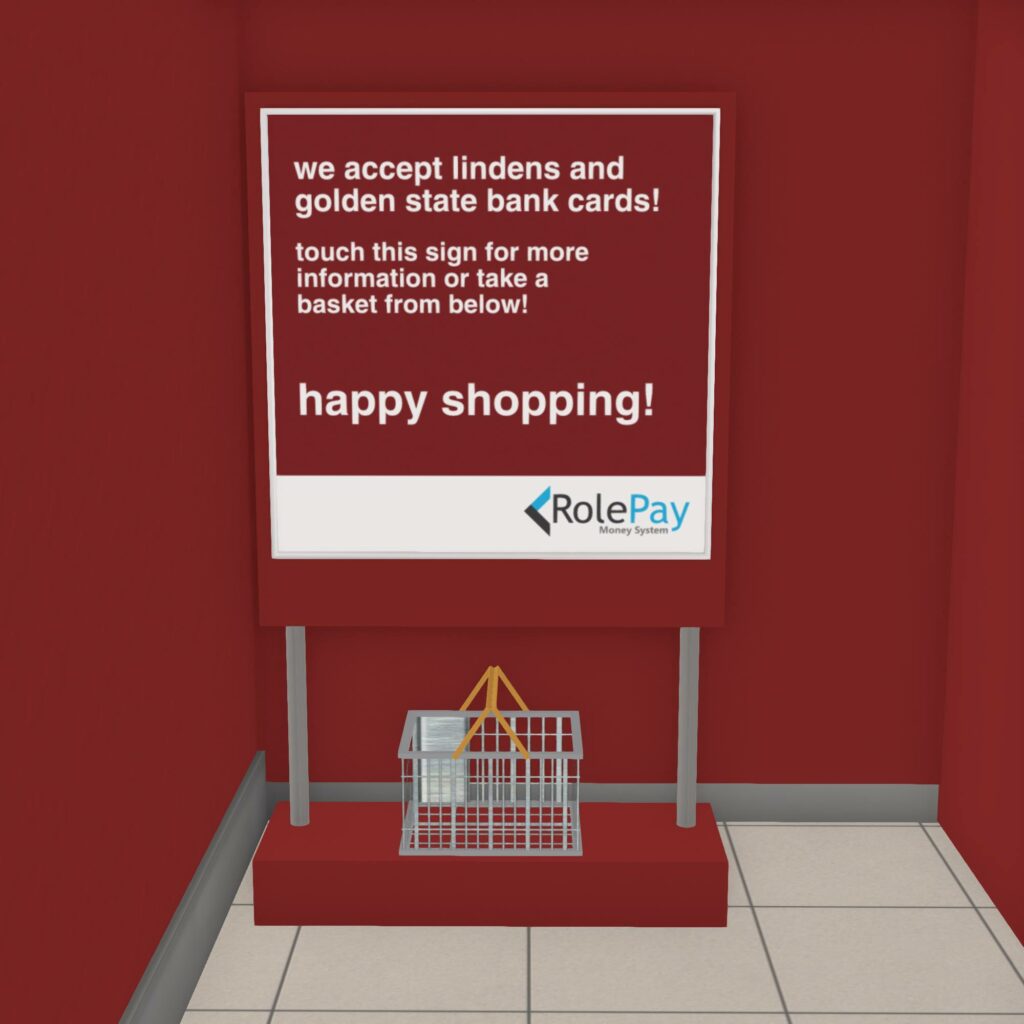
The basket system IS required for people to shop with the RolePay system, and it’s no-mod. However you can cover up basically all of it with prims or similarly sized objects, EXCEPT for the basket itself, and it will still work. I will provide an example of how I accomplished a better looking basket area with Bullseye. It’s basic prims + a frame from Half-Deer. Do what you like with yours, or leave it be! It doesn’t require any additional programming from you.
SETTING UP YOUR SHELVES:
I have great news! The shelves are 100% mod, and that’s how I accomplished taking the oversized shelf that’s provided and turning it into the little buttons I use in Bullseye.
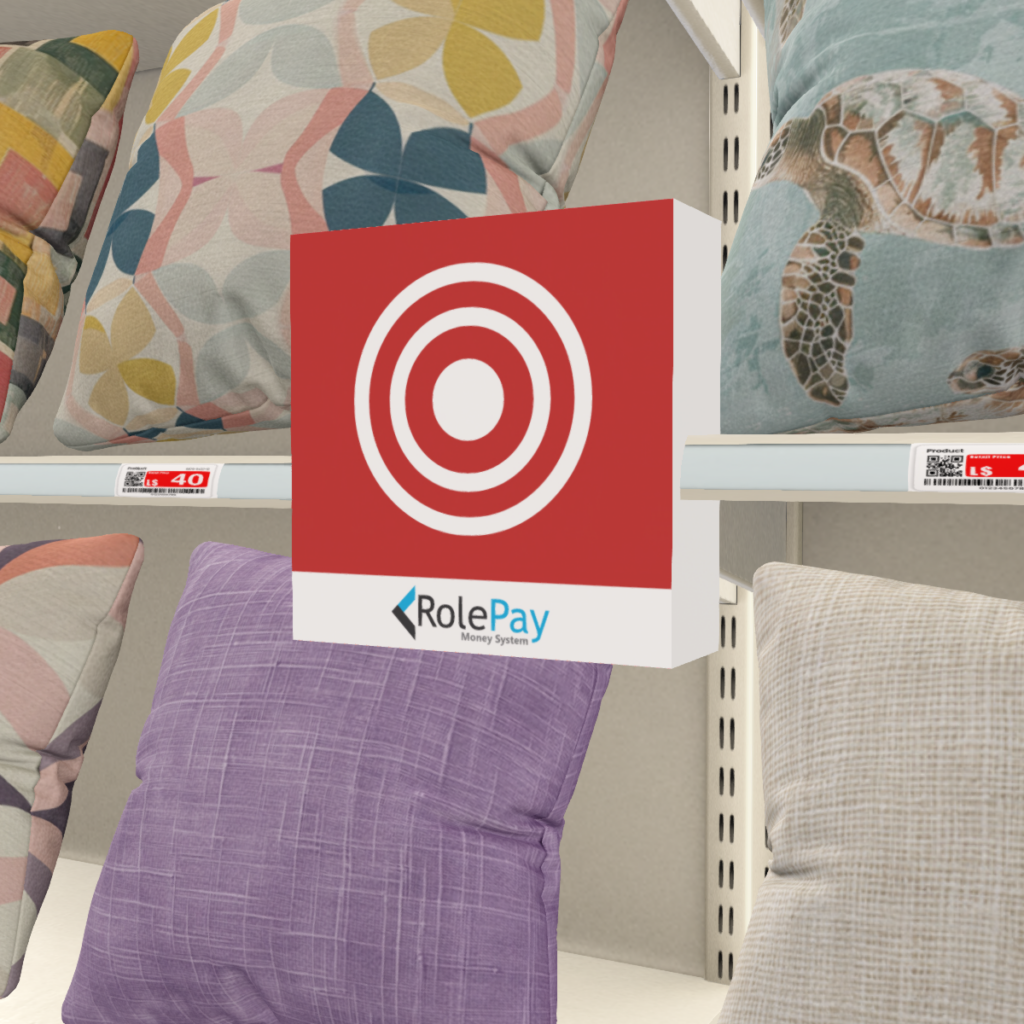
In order to fix up the shape, right click and “Edit” the shelf. Go to the “Object” tab, and fix up where it says “Taper”. You’re going to want both X and Y to be set to 0, for it to be a rectangle. You can change any of these settings you want, but that’s how you’ll get rid of the angled effect if you weren’t sure how to remove it.
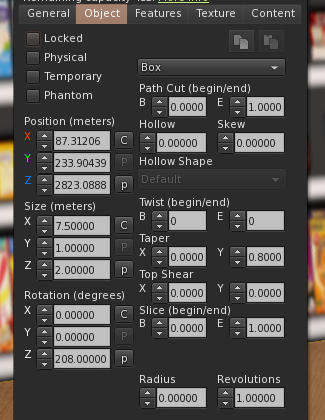
Add any texture you want to it. I opted for the “press the button” sort of sign, as I also sell my products for Lindens on the shelves. If you’d prefer to have a picture of products, or a sign for a service you provide, you can do that too!
Now, let’s prepare the items to be dropped into the Content tab of the “shelf”.
SOME VERY IMPORTANT INFORMATION TO REMEMBER:
– The “Single Shelf” only holds one item at a time.
– The “Multiple Shelf” only holds ten items at a time.
– The script does NOT like long names on the items. If the names are too long, it will only return an error message. Rename these particular versions of your items if you need to, then drop them in.
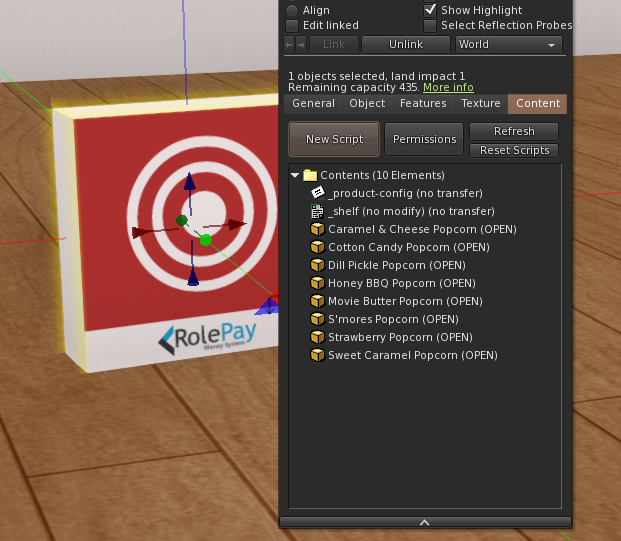
Ignore the floating warning text over the shelf for now, we’re about to fix it up!
Let’s open up the notecard named “_product-config”!
Here, you will list the EXACT names of each product, and also the prices they will be. When pricing your items, keep in mind that Portofino is based on current-day USD prices. I’ll show you mine as an example.
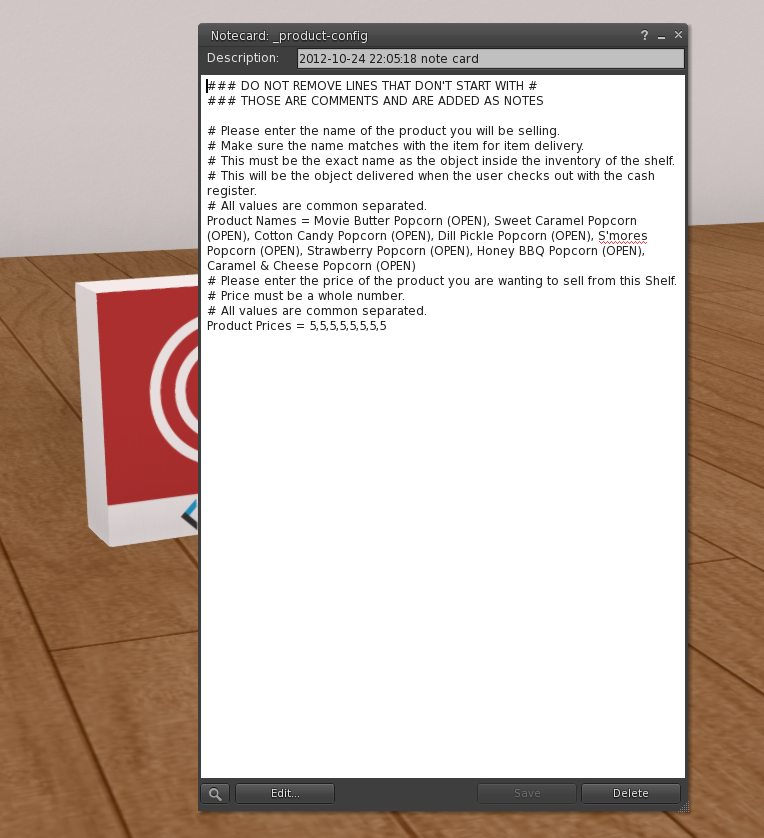
The price will need to be set for EACH item, so since all of my popcorn items are priced at “5”, I have “5” placed there over and over, with commas separating them. You can have your items be different prices, just make sure EACH item has one!
If something has a typo somewhere, the shelf will tell you that after it reconfigures itself (saving the notecard will make it do that automatically). If you don’t see any floating text, then move forward!
Touching your shelf item will bring up the menu. Shoppers who have a “cart” (basket) attached will be able to choose an item to put into their basket for checkout. You can try this out yourself now.
After the item has been added to your basket, go to your cash register, click it, and select “Checkout”. Customers will not need their bank account card attached to make this work, so long as they have an account in the first place it will work automatically!
And there you have it, you have a basic Rolepay system installed! Repeat this as many times as you need, for as many products as you have.
BONUS SECTION: Employee Payouts!
Have employees that need to be paid? You can purchase the expansion pack for this on Marketplace!
https://marketplace.secondlife.com/p/RolePay-Time-Clock-Expansion-Pack/11011001
Once you have the time clock, rez it out and put it where you want. Touching it will allow you to log in with your info and start setting it up!

By choosing “Dashboard” and clicking the link that it provides in local chat, you can access the special portal that allows you to set where your employees will be paid from, who is your employee, what their schedule is (they won’t be allowed to sign in to work outside of those hours), and how much they’ll get paid.
You have the option of setting up a “Network” through the Dashboard. You can then set your Cash Register to the “Funds-2-Net” option under “Settings”. When a customer purchases items, that money goes into the network instead of directly to your card. You can opt to have your employees (and yourself) paid by the hour from that pool of money, instead of needing it connected to your bank account.
IT’S VERY IMPORTANT FOR YOU TO KNOW THIS PART: You will be paying your employees yourself! Their salary is dependent on you, so be certain you’re ready to take on that responsibility before you begin adding others in. The town will not be covering their salary, just like in real life.
